Monday, October 31, 2011

Mediocre Baking


I have not baked in 13 days.  That is nearly 2 weeks, which is also half a month.  I cannot tell you the last time I have went so long without making some sweet-treat in my oven.  Actually, I can tell you the last time-- it was two years ago when I was studying for the bar exam and I could not afford the time to look at a recipe, let alone bake something.


Now that I have finally got back in my kitchen, I am off.  Not off to the point were what I make is inedible or unpleasant, and I am not setting the kitchen on fire; but off enough that my ideas, and even treats I have made before, are not turning out the way they should.  It is one thing when my personal life is out-of-whack, but when it affects my baking life, the one thing that always makes me happy, it is a problem.


I got to shake this funk and get my baking back to normal.  Nonetheless, the first disaster of this past week was S’mores Brownies, which I have made before.  This time the little additions I added thinking it would make the brownies more decadent, actually made them more hard, crispy, and unappealing.  The chocolate bars chopped on top burned and got gritty.  The marshmallows turned hard and chalky.  When I took a knife to the pan of brownies, all the topping fell off with each cut.  Were the brownies inedible?  No.  But, were they ooey-gooey and delicious?  I think not.


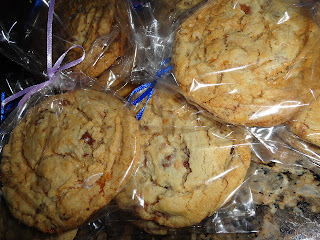
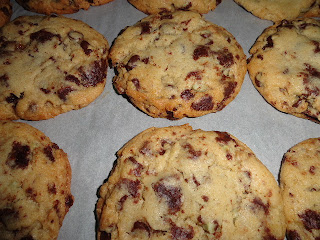
I was so embarrassed with the brownies that I could not take them in to my office.  So, the next night I wanted to make a special peanut butter cookie for a friend I am seeing over the weekend, who loves peanut butter cookies.  I figured I could make the cookies and take half the batch to my office and half to my friend.  Not baking for 2 weeks means my office went without a real baked good for that long as well.  (The cinnamon bun popcorn marshmallow treats do not count since they never entered the oven.)


I dreamed up a triple peanut butter swirl cookie.  A chocolate chip cookie base with Butterfingers candy bar pieces, Reese’s mini peanut butter cups, and creamy peanut butter swirled in the batter.  It sounds amazingly awesome, right?  Unfortunately, it did not come out as great.  The butter finger pieces melted into the batter making crunchy cookies.  The Reese’s cups deflated and lacked presence.  Finally, the peanut butter swirl caked and became brittle.  The cookies were a pain in the butt to handle and crumbled easily.  They tasted okay, but could be better.  This is definitely a recipe I will be trying again to accomplish a better result, because I think the idea was good, but the execution did not adequate embrace the idea.


So how long will it be before I bake another fantastic treat which I am really proud of?  I don’t know, but I pray it is soon!


Next day update: I was told by the kind and generous ladies in my office that the cookies were amazing.  One lady told me it was one of her all time favorites that I have made.  I was told this at 8:30AM.  A glowing recommendation?  I would say so.  Nevertheless, I am still not as thrilled with them: Work-in-progress.  Guess I am toughest on myself...

Sunday, October 30, 2011

Fly By Post: Cinnamon Popcorn Marshmallow Treats


I have really been wanting to make some caramel corn again.  Last time I had too much popcorn and there was not a consistent and even coating of caramel on the popcorn.  Don’t get me wrong, it was good, great even, but not perfect.

Unfortunately, with my schedule this week, I have not had the time.  Caramel corn, though easy to make, requires me to babysit the oven for an hour.  I did not have that kind of time.  So, I thought up this cinnamon caramel corn inspired treat instead.


Think rice krispies treats, but with popcorn instead of cereal.  The marshmallows are cinnamon bun flavored and I added in some toasted pecans for crunch.


These are sticky and sweet.  They did not completely hit the spot for caramel corn.  Yet, in a week were I have not had the time to bake anything, these at least satisfied my baking anemia.  Seven days without baking makes one weak!  (Pun intended)


Cinnamon Bun (flavored) Popcorn Marshmallow Treats

1/2 cup un-popped popcorn kernels, pop plain with no butter or salt
1 stick butter
1/2 cup brown sugar
Cinnamon to taste
Healthy dose of salt
8oz bag Jet Puff Cinnamon Bun Marshmallows
2-4oz plain marshmallows (to your taste)
1 cup chopped toasted pecans

1. Pop popcorn, remove all un-popped kernels, and set aside in large bowl.
2. Melt stick of butter. Once melted stir in sugar, cinnamon, and salt.
3. Let cook together for a few minutes before stirring in all marshmallows.
4. Let all marshmallows melt before removing the mixture from the heat.
5. Pour marshmallow mixture over popcorn. Throw in pecans.
6. Stir until all pieces are evenly coated. Dump the popcorn mixture into a prepared pan. I used an 8x8in for thicker bars, but 9x13in would be okay as well. (greased, parchment, or otherwise).
7. Let cool completely before removing and cutting.

Friday, October 28, 2011

My Top 100: Update #3

Time for another My Top 100 list Update. (Update #2) (Update #1) (Initial List)

Since my last updated, I have completed a ton (relatively speaking) of new items! I think I am making good progress. With the Holidays right around the corner, I foresee marking a few holiday specific items off the list. If I do not complete these items now, I will have to wait until the next holiday season or I will be making a beach ginger bread house in June.

I have made some additions to the list, because I discover new treats almost every day. Additionally, there are just some good ol’ down home desserts I would like to bake, or reinvent. I have also made some deletions to the list because some items only seemed like a good idea on impulse, but when cooler heads prevailed, I did not want to make the item as much.

Now, let’s chat about this twice a month quota I mentioned in Update #2. Well the first few months, I did not quite keep up with twice a month, but I kicked major butt and made up for it in August—7 items completed in one month! Plus, I have been pretty consistent since then as well. I guess this “quota,” though not a hard and fast rule, is doable.

Updated List:
Cakes, Cupcakes, and Mini-cakes
Moist Yellow Cake
Red Velvet Cake (New Recipe)
Carrot Cake (New Recipe)
Rum Cake
Petit Fours
Confetti Cake
Crumb Cake
German Chocolate Cake
Jelly Roll
Multi-Tired and Decorated Cake
Boston Cream Pie
Marble Cake
Yule Log
A Birthday cake for Mommy
Cake in a Jar (I still want to send it by mail in the future, when it is cooler outside)
Almond Cake
Fruit Flavored Cake
Zebra Cake
Ferrero Rocher Cupcakes
Honey Spice Cake
Tres Leches Cake
Coconut Cake (from “Good Eats”)

Icing, Frostings, Cake Coverings, and Fillings
Whipped Cream Frosting
Pour Fondant
Italian Style Buttercream
French Style Buttercream
Swiss Meringue Buttercream (New Recipe)
Chocolate Buttercream
Chocolate Icing made with Melted Chocolate
Coconut Pecan Frosting (Icing for German Chocolate Cake)
7 minute or Fluffy Boiled Frosting
Fresh Strawberry Frosting
Fruit Puree Filling
Lemon Curd Filling

Pies, Pastries, and All Things Flaky or Fluffy
Peach Hand/Fry Pies
Strawberry Rhubarb Pie
Doughnuts (Baked)
Doughnuts (Fried)
Sticky Buns
Cinnamon Rolls
Croquembouche-Cream Puffs
Éclairs
Pumpkin Cheesecake
Danish
Turnovers
Double Crust Pie
Latticed Top Pie
Pecan Pie
Cream Pie (36. Accomplished Sept. 3, 2011, for my mommy’s birthday)
Funnel Cake
Crack Pie
Ol’ Fashion Apple Dumpling

Cookies, Bars, and Brownies
White Chocolate Cherry Cookies
Chocolate Chip Cookie (New Recipe)
Traditional French Macrons
Lemon Bars
Graham Crackers
Short Bread
Whoopie Pies
Fudge
Checker Board Cookies
Stained-Glass Cookies
Gingersnaps

Yeast Breads, Quick Breads, and Muffins
Brioche
Croissants
Orange and Cranberry Muffins
Biscotti
Cornbread
Bagels
Rosemary Bread
Hot Cross Buns
Potato Bread
Pumpernickel Bread
Monkey Bread
Sweet Potato Biscuits
Blueberry Muffins (34. Completed July 29, 2011. Sorry, no pictures=no blog post)
Streusel Topped Muffin (35. Ditto)
Lemon Poppy Muffins
Bran Muffins
Cheese Bread

Desserts That Are Creamy and Ate With a Spoon
Banana Pudding (from scratch)
Chocolate Soufflé
Crème Brule
Bread Pudding
Vanilla Bean Pastry Cream
Chocolate Lava Cake
Fried Ice Cream

Savory
Butternut Squash Ravioli with a Browned Butter and Sage Sauce
Vegetarian Pot Pie
Spring Rolls
Corn Dogs

All Other Wonderful Things
Caramel Popcorn
Cereal
Granola
Crepes
Gingerbread House
Fruit Leather
Peanut Brittle

Wednesday, October 26, 2011

Wedding Cookies


This is another post dedicated to my dear friend, Yae, and her upcoming wedding.  When Yae started planning her wedding and I asked what I could do to help, the only thing she asked me to do was make wedding cookies for her Sudanese bridal dance.  Of course, the list has grown exponential since then (and I am happy to help and would take on even more, if she would give up some things), but I take pride in this first request.


I have never made wedding cookies before, so I was thrilled with the challenge.  I began searching the internet for recipes and discovered weeding cookies are fairly simple- almonds, powder sugar, and butter.  So, where was the challenge in that?


I decided that Yae deserved something more special than just a typical wedding cookie.  So, I decided to craft a recipe because I could not find one that delivered all the qualities I wanted.  I also decided to play around with flavor and nut combinations to create something new, inventive, and exciting.


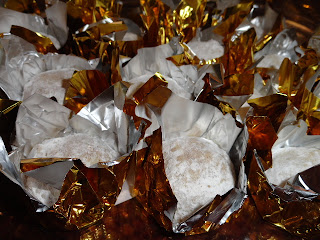
I will say that I did try all of these recipes in advance because they were new and they all came out great.  I gave Yae a tasters sampling a few weeks in advance and she and her family loved them.  The one not so negative comment that I received was that the cookies were messy (either because of the powdered sugar or butter, her mom did not specify).  I could not have Yae’s mom not loving the cookies, so I decided to place each cookie in a foil liner to catch the powder sugar or keep the butter contained.


The three flavor combinations were:
1) Traditional Almond Wedding Cookies (In the taste testing I did browned butter and whole almonds to give the cookies a speckled look.  Dealing with the browned butter changed the texture of the batter and the taste did not come through enough to justify the hassle.  Plus, this cookie did not remind Yae of the traditional wedding cookie.  For the actual bridal dance, I went traditional with skinless almonds and regular butter.);

2) Chocolate Hazelnut Wedding Cookies (I used skinless hazelnuts to make the cookie batter, then I pressed 2 dark chocolate chips into the center of the cookies batter as I was scoping it onto the cookie sheet.  It is reminiscent of Nutella.); and

3) Southern Style Wedding Cookies (I used pecans in the cookie batter followed by cinnamon in the powdered sugar coating.  I call these southern style due to the pecans.)


At the bridal dance the ladies loved the cookies and were pleasantly surprised by the array of flavors.  Each little wrapped cookie was a bite of nutty and sugary goodness.  Plus Yae’s mom liked the addition of the little foil cups to contain the “messiness.”  Everyone was satisfied and so was I. 


Wedding Cookies

By Baker at Law
Makes approximately 21 cookies per recipe

Ingredients for Traditional Almond Wedding Cookies:
1/2 cup (1 sticks) Butter
3/4 cup Powdered Sugar (3/8 cup [47g] in batter & 3/8 cup [47g] to roll cookies in after)
1 cup Flour
1/4 tsp Salt
1/2 cup Almonds (85 grams)
1/4 tsp Almond Extract

Ingredients for Chocolate Hazelnut Wedding Cookies:
1/2 cup (1 sticks) Butter
3/4 cup Powdered Sugar (3/8 cup [47g] in batter & 3/8 cup [47g] to roll cookies in after)
1 cup Flour
1/4 tsp Salt
1/2 cup Hazelnuts (85 grams)
1 tsp Vanilla Extract
approx. 40 dark chocolate chips

Ingredients for Southern Style Wedding Cookies:
1/2 cup (1 sticks) Butter
3/4 cup Powdered Sugar (3/8 cup [47g] in batter & 3/8 cup [47g] to roll cookies in after)
1 cup Flour
1/4 tsp Salt
1/2 cup Pecans (60 grams)
scant 1 tsp Rum Extract
1-2 tsp Cinnamon

Method:
1. Toast nuts in the oven until fragrant (do not burn). Let cool completely.

2. Place nuts, flour, and salt in food processor and grind until a fine mill is achieved.

3. Cream together butter and powder sugar for batter. Then add flavor extract.

4. Blend together butter mixture and nut mixture.

5. Dump batter onto plastic wrap and shape into a disk. Refrigerate for at least 30 minutes.

6. Preheat oven to 350F.

7. Using a small cookie scope, scope up batter. If adding in chocolate chip, place two chips bottom to bottom and press into batter while still in the scope. Cover up the bottom of the cookie where you pushed the chocolate in.

8. Release batter on to a parchment lined cookie sheet about one inch apart.

9. Bake for 12-14 minutes until firm and the bottoms are gently brown. Cool until can handle.

10. Shake cookies in powder sugar (and cinnamon, if using cinnamon).

11. Before you are ready to consume them, re-shake cookies in powder sugar before serving.

Monday, October 24, 2011

33. Tres Leche Cake


I find this particular challenge from my top 100 list very interesting.   Most of the items on my list are things I have tasted and want to make myself or things I have made before, but I want to experience in a whole new way.  This cake however, I have never tasted.


I have always been intrigued by this cake, every since I took elementary Spanish in high school and I learned “Yo quiero bizcocho de tres leche.”  A cake with three milks, is that even possible?  I did not even know three milks existed at that time.  I assumed one was goat’s milk and immediately decided I did not need to taste this cake.


As I got older and I started to explore new avenues, like in the last year, I decided that I wanted to give this beloved cake a (skeptical) try.

I ended up making this cake for the henna party I was going to make the Spiced Pumpkin Bundt Cake for.  I figured with the amount of decadence in this cake, not to mention the amaretto, it is comfort food. Right? Right.  So, this cake also become an addition to Yae’s Wedding Event dessert series.


The sponge whipped up too easily and baked with no problem.  After cooling, the sponge looked like it was just waiting to absorb the milk glaze.  The sponge was super absorbent and could easily handle all of the glaze produced by the recipe.  I being the nervous nelly that I am, did not use all of the glaze, just in case.


To frost this cake I used a stabilized whipped cream (w/o gelatin) recipe that I have used in the past.  Lastly, as is traditional (I assume from all my internet searching), I topped the cake with some cherries for a pop of color.  I think a fresh cherry would be the perfect tart sweetness to garnish the top, but right now it is not cherry season.  Note to self and you, dear reader, if it is fresh fruit season, I would highly recommend a fresh, less sweet garnish.


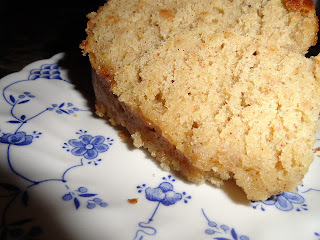
Oh my, sugar high, pumpkin pie, was this cake good.  (That is my new phrase when something is more than yummy!)  I did not think I would like the taste of milk nor the texture of soggy cake, but I was wrong.  The flavor of the milk is complex and the addition of amaretto is a great touch.  Plus, this cake was not soggy at all.  The composition of the cake was made to absorb the milk yet not get soggy.  Genius!


The ladies at the partying were damning me for metaphorically shoving copious quantities of cake in their mouths, meaning that is was so good they couldn’t help but eat it, and eat some more, and eat some MORE!  I think women willing to eat a small child’s weigh in cake a week before putting on formal dresses for a wedding tells you just how good this cake was :-)


Tres Leche Cake

Adapted from Veronica’s Cornucopia

Sponge Cake Ingredients:
5 extra-large eggs, separated
2 cups granulated sugar
2 cups all-purpose flour
2 tsp baking powder
1/2 cup 2% milk
1 tsp vanilla

Milky Goodness Ingredients:
1 12-oz can evaporated milk
1 14-oz can sweetened condensed milk
1 cup heavy cream
2 TBS Amaretto

Whipped Cream for Frosting (recipe at bottom of the linked post)

Method:
Preheat oven to 350F.

1. Whip egg whites to a soft peak stage. Add in sugar slowly until stiff peaks form. You will have to work quickly (without hurting egg whites), as it is a lot of sugar to add in a short amount of time.

2. Beat in egg whites one by one until just incorporated, fully.

3. Combine milk and vanilla in a measuring cup.

4. Combine flour and baking powder in separate bowl.

5. Add flour mixture and milk mixture alternating, starting and ending with flour.

6. Spray with Pam with flour (or similar spray) a 9x13inch pan that is okay for oven and serving.

7. Bake for about 30-35 minutes until golden brown and a tooth pick inserted comes out clean.

8. Once cake is out the oven, let it cool for 30 minutes before poking it all over with a skewer to create little holes.

9. Let cake continue to cool completely.

10. Make milky goodness by combining all milks with a whisk.

11. Slowly pour the milky goodness over the entire cake. Be sure to saturate the edges of the cake; they tend to be the dryest. If the milk start to puddle wait a few minutes to let it absorb and then continue to pour the milky goodness over the cake. The cake will be able to absorb the entire mixture, but use as much as you are comfortable with.

12. Cover with parchment and foil (or other non-stick material). Refrigerate the cake for at least four hours, but over night is better.

13. Whip up a simple whipped cream and slather over the entire cake.

14. Garnish with cherries or other fruit, if desired.

Friday, October 21, 2011

Pumpkin Spice Bundt Cake


This is another post dedicated to my dear friend Yae and her upcoming wedding.  To get ready for her bridal dance Yae held a henna party at her house.  The henna party is a time for Yae’s close girl friends to come over; celebrate the upcoming event(s); and most importantly keep Yae feed and entertained while she sits there for hours upon hours getting her henna drawn, letting the design set & stain, and then removing it.  (It is also an opportunity for friends to get henna designs drawn on them as well.)


The theme of the henna party was one near and dear to Yae’s heart—Comfort Foods.  A normal wedding process can be super stressful, but if you couple the normal American wedding events with the traditional Sudanese wedding events, you have four times the number of events and four times the amount of drama, stress, and craziness!  What Yae needed in her life so close to the wedding was a little comfort.


The get-together was potluck style, with everyone bring their favorite comfort food.  What is my favorite comfort food?  This time of year, I go for pumpkin and warm spices.  Nothing makes me feel more wrapped in autumn goodness than a dish containing those ingredients.

I saw the below recipe on one of my favorite baking blogs, I am Baker.  I was immediately captivated by the picture of the dripping creamy pumpkin glaze.  When I first saw the recipe, I knew it would be a winner to bake and take to the henna party.  It was comfort food at its best and with a party full of willing eaters, I would not (have to) eat the entire cake myself.


Update: I try to write post in advance, when I have the time.  Well, this time it has come to bite me in the behind.  The day I was supposed to make this cake, I checked the RVSP list and someone else had RSVPed that they were bringing pumpkin cake.  The party was going to be fairly small and having two of the same desserts did not feel right to me.  Moreover, I did not want the other person to feel like I was trying to steal her pumpkin cake thunder, so I scratched the idea of taking the cake to the party.


Yet, I still wanted this cake!  So, I (admit selfishly) made the cake, knowing it would not be going to the party and then took it to my office to share with my co-workers.  I waited patiently for someone else to cut the first slice, then and only then would I allow myself to take a slice home, for photos of course. 


I was told by a certain office mate that this cake “soothed the savage beast!”  It had been a particularly maddening day at work and this cake brought a smile back to my co-worker’s face.  That is more than a complement, considering the stressful week we have had; that is a glowing shinning endorsement, making this recipe a keeper!

Update, Update:  The lady who RSVPed that she was bringing pumpkin cake, did not bring the pumpkin cake; she did not even show up.  **I shake my angry fist at her.**

Pumpkin Spice Bundt Cake w/ Creamy Pumpkin Glaze
Adapted from a guest post by Dine & Dish at I Am Baker

Cake Ingredients:
2 cups granulated sugar
1 cup butter, room temperature
4 large eggs, room temperature
1 cup homemade or canned pumpkin puree
1 cup sour cream
2 tsp vanilla extract
3 cups all-purpose flour (add another 1/4 to 1/2 cup flour if your homemade pumpkin puree is more liquid-y than the canned variety)
2 tsp ground cinnamon
1 tsp all spice
1/2 tsp nutmeg, or more to taste
1 tsp baking powder
1 tsp baking soda
1 tsp salt

Cake Method:
1. Preheat oven to 350F. Prepare a 12-cup Bundt pan with a floured/oil spray (or traditional butter and flour method).

2. Cream together butter and sugar until light and fluffy.

3. Add eggs one at a time and mix until well incorporated.

4. Continue mixing adding the pumpkin, sour cream, and vanilla until well blended.

5. In a separate bowl mix together remaining (dry) ingredients and add to liquid batter one cup at a time, blending until well incorporated.

6. Pour cake batter into pan. Bake for 60 minutes or until a tester (knife, toothpick, etc.) inserted into the center comes out clean or with a few moist crumbs, no batter.

Glaze Ingredients:
1 cup powdered sugar
approx. 1/4 cup homemade or canned pumpkin (The amount will vary. Use a little at a time until you get the glaze to a nice thick pourable consistency.
Cinnamon and Allspice to taste

Glaze Method:
1. Whisk together powdered sugar and pumpkin puree until no lumps appear.

2. Add spices.

3. Once glaze is smooth, slowly pour over the top of the cake. Use as much glaze as you prefer.

4. Allow cake to set for a while to allow glaze to form a light shell.


Candied Pecans- I planned to make these, but did not. I still thought it would be nice to give you the recipe.
Adapted from the Better Homes and Gardens Cookbook

Ingredients:
2 cups pecans, toasted
1/2 cup brown sugar
2 TBS butter
1 tsp vanilla extract

Method:
1. In a medium skillet over medium heat melt butter, than add brown sugar and pecans.

2. Stir until all the pecans are coated.

3. Continue stirring as the mixture bubbles, reduces, and browns slightly.

4. Remove from heat and stir in vanilla. Be careful, the mixer will bubble up and emit steam.

5. Pour out coated nuts in a single layer on to a parchment lined cookie sheet and allow to cool completely.

6. Break apart any large pieces with your hands.

7. Use as a toping on anything you like- cake, ice cream, even salad!

Wednesday, October 19, 2011

Fly-by Post: Birthday Baking


I am making a sincere effort to blog more about what I bake.  I bake A LOT more than what I post here.  I bake for my office at least once a week, but usually twice.  Not all of those treats make it here, however.  That would require me to take pictures AND write witty stories about everything I make.


I recently got a new camera, well not so recently.  But, I did recently up load the software to get the pictures from my camera to my computer.  This camera takes amazing pictures.  Not that they are all artistic and I do not have the time for photo styling, but I get much more awesome quality pictures than with my previous camera (which the view finder showed static due to it being dropped and I still used it for over a year).


So, I will be posting more pictures here of what I bake.  I cannot promise the writing will be phenomenal; heck, the writing is not phenomenal now.  So, here is my first fly-by post.


Another cross-continental friend, Sef, is having a birthday soon.  I wanted to send her some treats, just a few sweet and not so sweet options.  One of Sef’s favorite things I have ever made weas cheddar and dill scones—go figure, something savory.  I do not do savory often and out of all the sweet things I make, she had to love this one savory thing.


So, for her birthday I decided to whip these up.  I adapted the Barefoot Contessa’s Cheddar Dill Scone recipe, available on Food Network.com.


I couldn’t only do something savory, so I made something sweet as well.  I wanted to do something different.  I came up with the idea of Cinnamon Chip Snickerdoodle Cookies.  After doing some internet searching, I found the name Cinnadoodle Cookies and adapted a recipe from Two Peas & Their Pods.


Lastly, a gift is not a gift without chocolate.  So, I made Mint Brownie Chip Cookies.  I folded in fully baked frozen brownie pieces and mint morsels into chocolate chip cookie batter.  I am really feeling brownies in cookies right now.


I hope Sef likes her treats and has a wonderful birthday.  (Please access the above site/blog to find the recipes.  Because this is a fly by post, I did not have time write up the recipes.)

Monday, October 17, 2011

32. Cake on a Smaller Scale (Carrot Cake)


There was a period of time when I was making birthday cakes for my office every few weeks. We have not had an office birthday in quite some time and the next Birthday is 2 months away. No birthdays means no cake.

But, you do not have to have a birthday to enjoy cake. I wanted to bring cake to the office just to celebrate Friday and making it through a particularly difficult week. I wanted to do cake on a smaller scale, understated. I did not want to go full on triple layer, round cake mode and I am not a fan of cupcakes. So, what to do?


Cake in a jar.  It is portable and contains nearly two full servings a jar; and hello, it is super cute!  So, cake in a jar it was.  I wanted to give my office mates two different options--chocolate and non-chocolate.  One jar contained chocolate cake with Nutella swiss meringue buttercream, garnished with chopped hazelnuts and chocolate chip.  The other jar contained carrot cake with swiss meringue buttercream, garnished with almond slices and crystallized ginger.


For the chocolate cake: I used my favorite chocolate cake recipe (from the neapolitan cake).  I also added nearly four ounces of room temperature nutella to a half batch of my 1:2:3 (5 oz egg whites) swiss meringue buttercream.


For the carrot cake: I used a new recipe, marking another challenge off my top 100 list.  I then took the other half of my 1:2:3 swiss meringue buttercream and added 8 oz of room temperature cream cheese and approximately a cup of powdered sugar.


My office mates loved both cakes, though personally, I believe the jury is still out on the carrot cake.  Overall it is generally a good recipe and is definitely not dry like a recipe I tried previously.  I would like darker and deeper flavors; so next time I am thinking of trying brown sugar or adding in molasses.


To make any cake into cake in a jar is super easy.  I use 8 oz jars and a circle cookie cutter that cuts out cake into circle pieces perfect size for the jar.  Push in one piece of cake into the jar, pipe in some frosting.  If adding garnish for texture between the layers place some in there now.  Then repeat the above.  Top with the mason jar lid and twist on rings.  Very easy to assemble, but BIG on presentation.


Carrots Cake Recipe
(named Best Carrot Cake of All Time, but I am not ready to give it that title)
Adapted from Tasty Kitchen

Ingredients:
2 1/2 cup All-purpose Flour
1 tsp Baking Soda
1 tsp Baking Powder
1/2 tsp Salt
1 heaping tsp Ground Cinnamon
1/2 tsp Allspice
1/8-1/4 tsp Nutmeg
3 large Eggs
2 cups Sugar
3/4 cup Butter, melted
3/4 cup Buttermilk
2 tsp Vanilla Extract
256g Carrots, finely grated
1 can (8 oz) crushed pineapple, drained

Method:
1. Preheat oven to 350F. Prepare one 9x13 in pan with flour and butter spray.

2. Combine flour, baking soda & powder, salt, cinnamon, all spice, and nutmeg. Set aside.

3. Beat together melted butter and sugar, followed by eggs, buttermilk, and vanilla until smooth.

4. Beat in flour mixture until just combined.

5. Fold in carrots and pineapple.

6. Pour into prepared pan and bake for 35-40 minutes. A toothpick inserted should come out clean or with a few moist crumbs.

7. Let the cake cool and then use to make cake in a jar as described above.

Thursday, October 13, 2011

Cinnamon Almond Roca Blondies


What do you do with left over candy? You re-event them into something even more delicious! One week ago, I and another Bridesmaid, Vie, helped our friend Yae assemble all her favors for the wedding, bridal shower, and rehearsal dinner. After labeling, bagging, and ribbon-ing all the favors, there were left over Almond Rocas.

I left the leftover Almond Rocas at Yae’s house that night. Two days latter, Yae made a special trip to my house and dropped off the leftovers. Almond Rocas were her favorite candy and she did not want to devour the 20-30 pieces of candy left. I gladly accepted the candy and was determined to bake it into something.


I was playing around with the idea of cookies, but settled on the blondie idea instead. I have only attempted to make blondies once and it was a disaster. Not every recipe is a good recipe, and the previous one was horrible. This blondie recipe was phenomenal however.

These blondies came out chewy, gooey and delicious. These are more than just a chocolate free brownie or a chocolate chip cookie bar, which is what most blondies are compared to. These little beauties deserve a category and name of their own. I can definitely see using theis recipe as a base and just changing the add-ins in the future.


I did share with Yae one of the blondies (it was perfect portion control according to her) and I took the rest into my office.  These are decadent and I suggest cutting them into smaller pieces, more to share that way.


Cinnamon Almond Roca Blondies
Adapted from Two Peas & Their Pod

Ingredients:
1 1/2 cups Cake Flour
1 1/2 tsp Baking Powder
1 tsp Ground Cinnamon
1/4 tsp Salt
1 1/2 cups Light Brown Sugar
1 1/2 sticks (3/4 cup) Butter, melted
2 large Eggs
2-3 tsp Vanilla Extract
approx 2 cups Almond Roca, chopped/smashed into small pieces

Method:
1. Adjust rack in oven to lower third of oven and preheat oven to 330F.

2. Line 8 inch square pan with parchment paper.

3. Mix together flour, baking powder, cinnamon, and salt. Set aside.

4. Whisk together butter and brown sugar. Next whisk in eggs and vanilla.

5. Whisk dry ingredients into butter mixture until just combined.

6. Fold in Almond Roca pieces and then pour into pan.

7. Bake for 50-55 minutes until a tooth pick inserted comes out with no batter, but possibly melted toffee and/or moist crumbs.

8. Cool completed, cut into bars, and enjoy.